Blogs

Archive for the ‘Microsoft 365’ Category

Microsoft 365 Update:- Viva Connections is now generally available!

Posted on November 16th, 2021 by admin@mismo2023

Viva Connections, part of Microsoft Viva, is your entry point to a modern employee experience. You get an all-in-one experience with the customized dashboard, the feed, and other relevant resources with the Viva connections app in Microsoft Teams mobile, web & desktop.  

This GA (general availability) provides you with the ability to: – 

  • Set a SharePoint home site from the SharePoint admin center 
  • Create, author, and manage a dashboard from the home site 
  • Use the new Dashboard and Feed web parts on the home site 
  • Brand the Viva Connections app for the desktop and mobile experiences for Android and iOS 
  • Use Video news links to communicate announcements 

It is to be noted that the Viva connections require admin configuration in the Teams admin center to enable as it is in the “Blocked” state by default. Once the home site in SharePoint is generated & the dashboard gets published, the Teams admin can enable & customize the Viva connections app in the Teams admin center. This feature is available now. 

Contact us for more information.

Microsoft Teams Updates (June 2021)

Posted on July 2nd, 2021 by admin@mismo2023

In this blog, we will be discussing the various Microsoft Teams updates in the month of June.

Meeting Updates:

  • Presenter Mode

During the past few months, this feature has been heavily promoted by Microsoft, finally you can start using this latest meeting feature that gives you an added advantage with respect to how you want to present your content & video feed to your viewers. The new feature gives you the ability to customize the way your content & video feed is being displayed in the meeting by utilizing layouts like “Standout” which exhibits the presenter’s video as a silhouette in front of the content being shared. As of now, this will be the only layout available for use, however, there are two additional layouts (Reporter and Side-by-side) coming soon!

Calling

  • Updated calling user interface

The calling tab layout in Microsoft Teams has been updated. With this, you will get a much more streamlined view that has voicemail, contacts and even calling history all on a single screen. Before this update was rolled out, the users had to switch between several different tabs to get to the desired area.

Chat and Collaboration

  • Group chat with external users

A lot of you must be aware that, Microsoft Teams lets you have a conversation with up to 250 participants within a single chat. Now, even though it is a great feature in its own right, Microsoft has decided to expand on this capability by giving its users the ability to add multiple federated/external users into chats to make collaborations easier. Earlier, you could only have a single user for federated chats which means that you had to create a Teams meeting with all federated participants for you to communicate with them all at once.

Important Reminder for all the Teams administrators- Do not forget to have a look at your external access/federation settings as it is the primary setting driving this ability to chat with federated users.

Security, Compliance, and Privacy

  • Customer Key support in Teams

The Microsoft 365 Customer Keys allows an organization to meet specific compliance requirements by providing encryption keys that are used to encrypt your data in a Microsoft Datacentre. This is handled via the DEPs (Data Encryption Policies) which encrypt your data across multiple M365 workloads for all users within the tenant. Since, it is a part of Microsoft Teams, it could include:

  • Teams chat messages (including 1:1 chat, group chats, meeting chats, and channel conversations).
  • Teams media messages (code snippets, images, video messages, audio messages, wiki images).
  • Teams call and meeting recordings stored in Teams storage.
  • Teams chat notifications.
  • Teams chat suggestions by Cortana.
  • Teams status messages.

Subscribe to our monthly newsletter to receive all the latest updates on Microsoft Teams.

For a free demo contact us here!

Thanks for reading.

How Startups can succeed with Cloud Computing?

Posted on May 7th, 2021 by admin@mismo2023

Startups are an enjoyable but demanding professional experience. A host of entrepreneurially dedicated professionals pursue their passion and dive into the world of launching their own company with meteoric growth from businesses. E.g., Facebook, Uber, and Airbnb.

It is noted that in the fast-paced world of startups, there are a lot of challenges that are not faced in the regular office environment. From infrastructure to marketing, all processes of a startup must be built from scratch which becomes difficult for a new company, mainly due to a lack of investments. While the employee count can be subsequently low at the beginning with individuals being from multiple cities or even countries, the major issue arises when a proper structure is required to manage the work of each member.

With Cloud Computing above risks can be reduced.

First, let us understand what is cloud computing?

Cloud Computing is a network of computing services like servers, storage, databases, networking, software, analytics, and intelligence. You only pay for the cloud services you use which helps in reducing operational costs & runs your infra more efficiently. It follows a Pay as you go (PAYG) cost model for cloud services, which is much more beneficial than the traditional IT cost model that has a lot more upfront capital expenditures for both hardware and software requirements.

Read More:- Storage on Cloud

Read on as we discuss the reasons why adopting cloud computing systems can benefit your startup business.

Many people tend to think that life in the world of startups is very fascinating & exciting, still, it cannot be denied that it has its own set of risks and demerits. In a report presented by the Small Business Administration (SBA) Office of Advocacy’s (2018) Frequently Asked Questions (FAQ), it was stated that the number of Small and medium-sized enterprises (SMEs) that are able to sustain through the five-year mark, range from only 45.4% to 51%.

 All bodies of startups have many risks: founders, investors, customers, and partners. But by following a proper approach such risks can be avoided.

As discussed, startups face the following few problems:-

  1. Employee location. (different cities/countries/regions)
  2. Lack of funds.
  3. Stability.

Here are the major benefits of adopting cloud computing for your startup:-

  1. Data Protection: Cloud Solution Providers put forward a group of technologies & services which help in data protection. Daily backups and snapshots on secure servers will secure your data.
  2. Speed & Low Cost: Cloud Computing enhances the flexibility of your business. With just a few taps, it offers you a creative IT infrastructure at low costs. It is easy, quick, and requires minimal investment. You only pay when you use the server.
  3. Effective Collaboration: With Virtualization now being the ‘new normal’, all the employees can work more profusely without the need for large spaces. Also, decreased infrastructure costs, power usage, maintenance, upgrades, hardware, installation services, and support expenses – all of which are immeasurably valuable savings for a startup. Cloud Computing allows all the employees of a firm to access various documents, files & other data from anywhere, anytime via Internet-enabled devices.
  4. Scalability: A Cloud storage platform allows the organization to scale resources up or down in a flexible and cost-effective manner. Contrary to the conventional approach, where human intervention is necessary and costly, sophisticated software and hardware can be inserted or removed according to your convenience. The virtual existence of the cloud increases the usability and availability of service additions. The cloud’s versatility, usability, flexibility, and competitiveness to entrepreneurs are thus critical to the long term success rate of today’s marketplace.

The mobility, accessibility, affordability, and productivity that the Cloud provides is extremely beneficial for startups.

If you have any more ideas on how cloud computing can help startups, do share in the comment section. To read more blogs by Mismo Systems, click here.

A quick look at the 4 Most Used Services on Microsoft Azure

Posted on May 4th, 2021 by admin@mismo2023

1. Azure Compute

Azure compute is an on-demand computing service for running cloud-based applications. Azure compute service can be divided broadly into three categories.

  • Infrastructure as a service

Virtual Machine: It is an IaaS service that allows us to deploy and manage VMs inside a virtual network (VNet). The most fundamental building block is the Azure virtual machine. We don’t need to buy any physical hardware and bear its maintenance cost. Using Azure virtual machine, we are able to deploy different services such as Windows, Linux within the Azure cloud. All this gets done within a few minutes. When we implement a virtual machine, every virtual machine will have an associated OS disk and data disk (if we want).

  • Platform as a service

App Service: It is a managed PaaS offering from Microsoft Azure for hosting web apps, mobile app back ends, etc. With this, we can simply upload our code and it deploys the application for us.

  • Serverless services

Infrastructure provisioning and management are invisible to the developer, hence the name serverless.

Azure Functions: With azure functions, we can run small pieces of code (“functions”) without worrying about the application infrastructure.

Azure logic apps: Azure logic apps are similar to azure functions, just that we don’t have to write code. With this, we can schedule, automate and orchestrate tasks, etc.

2. Azure Site Recovery

Azure Site Recovery is Azure’s built-in disaster recovery as a service (DRaaS).

What it does is when primary infrastructure goes down then it directs to the secondary infrastructure until it comes back again. It helps in business continuity.

As an organization, you need to adopt a business continuity and disaster recovery (BCDR) strategy that keeps your data safe when planned and unplanned outages occur.

Simple to deploy and manage:

We can set up Azure Site Recovery simply by replicating an Azure VM to a different Azure region directly from the Azure portal. Azure Site Recovery is automatically updated with new Azure features as they’re released.

Reduce infrastructure costs:

It reduces the cost of deploying, monitoring, patching, and maintaining on-premises disaster recovery infrastructure by eliminating the need for building or maintaining a costly secondary datacenter.

Testing without disruption:

 You can easily run disaster recovery drills, without affecting ongoing replication.

RTO and RPO targets:

The recovery time objectives (RTO) and recovery point objectives (RPO) are within organizational limits. Site Recovery provides continuous replication for Azure VMs and VMware VMs, and replication frequency as low as 30 seconds for Hyper-V.

3. Azure Content Delivery Network (CDN)

Azure CDN delivers high bandwidth content to users by caching their content at strategically placed nodes across the world. It lowers the latency to a great extent and reduces the file download time.

CDN stores the cached content on edge servers in POP (Point of Presence) locations that are close to end-users.

4. Azure Cost Management

 While the cloud made it easy to deploy and manage thousands of resources, it’s also important to manage the cost. Microsoft Azure Cost Management delivers cloud business management solutions to multi-cloud enterprises so that they can grow the cloud with confidence. It helps organizations effectively manage and optimize cloud spend across Azure and other clouds.

Azure Cost Management is a SaaS offering that helps organizations to monitor, allocate, and optimize cloud spend in a multi-cloud environment (Azure, AWS and Google Cloud Platform, etc.).

  • Service on by default
  • Set budgets, track, and get alerts.
  • Maximize cloud potential.
  • Free to manage azure costs.
  • Integrated with the azure advisor.
  • Optimize cloud spending.

Have questions? Let us know in the comments section below!

Breakout Rooms and Its Usage – Microsoft Teams

Posted on April 18th, 2021 by admin@mismo2023

In this blog, we are going to discuss a feature provided by Microsoft teams known as Breakout rooms. Also, we will focus on how we can create and manage it with a proper set of procedures. To be able for this feature to work seamlessly you must be the meeting organizer and use the Teams, desktop client, to access the breakout rooms option and to manage breakout rooms and participants.

If you want to use breakout rooms, you will either need to start a Meet Now meeting in a channel or calendar or schedule a private meeting with selected participants or a channel. Calls from chat interfaces do not support this feature as they are not considered meetings.

Context

  • Breakout Room Purpose and Need.
  • Using a Breakout Room

Breakout Room Purpose and Need:

Basically, a breakout room is a feature in Team meetings where a private room can be added inside the main meeting which the users can join and communicate. It allows a group of users to communicate with each other while the main meeting is ongoing.

This helps the group of users to save time and energy in creating another meeting and adding designated users in it and further joining back the main meeting back. The meeting organizer can create up to 50 breakout rooms and choose to assign participants automatically or manually into rooms.

An example that will simplify the concept of having this feature – let us say there is an organization that is inviting its different employee teams/groups for a meeting. In the meeting, they will discuss project ideas from different teams/groups.

Now traditionally if we implement this scenario, the solution to this will be first to create the main meeting room where all the tasks for each team must be discussed. Then these teams will start their own respective meeting to discuss project ideas. So, if there are 25 teams then 25 new meetings will be started which can result in mismanagement and more overload.

Now using breakout rooms in teams this can be done in few minutes and with barely any overload as well it is easily manageable. Admin can create 25 breakout rooms which will be there in the main meeting itself and the admin can monitor activities in the rooms easily including other features too.

 How to create and manage breakout rooms:

Let us start with the prerequisites, and it is quite simple. You need a private team in Microsoft Teams. Breakout rooms cannot be set up before a meeting and must be created after the meeting has started. 

Note: It is recommended NOT to invite participants until all the preparations are done. It can cause lots of calendar pop-ups for invitations in the meeting which would be a bit annoying for the participants.

 The breakout room icon is located on the meeting menu between the reactions control and the ellipsis that reveals additional actions.

  1. Join your meeting from the Teams desktop client.
  2. Once the meeting has started, select the breakout room icon.
  3. In the pop-up settings window, select the number of breakout rooms you want to create and how participants will be assigned:
    • Automatically – participants who have already joined the meeting will be assigned into equal-sized rooms. Participants who join the meeting after automatic allocation will need to be assigned manually.
    • Manually – allows you to assign participants to rooms as you choose.
  1. Select Create rooms button. A menu will appear to the right of your Teams meeting window displaying room management options, room titles, participants, and status of your breakout rooms and participants.
  1. To manually create additional rooms, select Add room.
  2. To assign/move a participant, select the closed room where the participant is currently assigned. Check the boxes next to the names of the participants you want to move. Select Assign and choose any room you want to place them in.

Note: The participants joining via a desk phone or Teams mobile app cannot be assigned and will remain in the main meeting.

  1. To edit the title of a room or delete it, hover over the status icon next to the room title:
  2. Rename room: Change the title of the selected room. It is recommended to create a specific title as the chat log remains accessible for participants after the meeting.
  3. Delete room: Remove the selected room. Any assigned participants will be moved to the list of unassigned participants. To open additional overarching room settings, select the ellipsis icon next to the Breakout rooms heading, and chose rooms settings while all rooms are closed:
  4. Automatically move people into opened rooms – select to move participants automatically in and out of their assigned rooms when you open or close the breakout rooms. Participants will receive a notification that they will be moved automatically with 10-second notice.
  5. Let people go back to the main meeting: select to allow participants to move between the main meeting and their assigned breakout room when the breakout rooms are open. If this option is not selected, participants will be able to move back into the main meeting by selecting Return, or back to the breakout room by selecting Join room.

Note: It is not possible for participants to switch between breakout rooms unless the meeting organizer has assigned them a new room.

  • Recreate rooms: delete all current rooms and settings to start from the beginning.
  • Make an Announcement: Organizers can send announcements to the breakout rooms and recall all participants back to the main meeting at any time.

When you are satisfied with the breakout rooms allocations and settings, you need to open the rooms to allow participants to access them.

  • To open all the rooms at once, select Start rooms. The status icon next to the rooms will change from Closed to Open.
  • To open individual rooms, hover over the Closed status icon of the room and select the ellipsis icon. Select Open.
  • When participants are in the breakout room, in meeting displays beside their name. If this status is not shown beside a name, you can prompt the participant to enter the breakout room by selecting their name and Ask to join.

You will be added to the breakout room and can interact with all features of the meeting.

  • While you are in a breakout room, you will be On Hold in the main meeting and will not be able to see if participants have entered the main meeting until you return to the main meeting.
  • Select the Leave button to leave the breakout room and return to the main meeting.

At the end of the meeting, you can either leave your breakout rooms open or closed.

  • Open: Allows participants to continue collaborating to the breakout room chat and re-open the breakout room meeting after the main meeting has ended. If the meeting is recurring, your breakout room settings and allocations are saved and maintained for subsequent meetings.
  • Closed: Breakout room chats become read-only for all participants after the meeting has ended and cannot be re-opened. Breakout room settings and allocations are not saved for subsequent meetings.

Have any questions? Let us know in the comments section below. Thanks for reading!

Package Manager for Microsoft Intune Administrators – Part 1

Posted on February 3rd, 2021 by admin@mismo2023

Deploying applications to end-user Windows machines has never been easier if you are a Microsoft Intune administrator. Earlier what used to be a painstaking process of installing each application and its required dependencies one by one, has evolved into a professional solution where you can package all the applications along with their required dependencies into one complete “.intunewin” package for a simplified solution.

The concept of modern management or modern device management takes this a step further by providing IT administrators an even simpler way of installing, managing, updating & uninstalling applications using package managers.

Linux adopted early the practice of maintaining a centralized location where users could find and install the software.

What is a “Package Manager”?

A package manager or package management system is a collection of software tools that automates the process of installing, upgrading, configuring, and removing computer programs for a computer’s operating system in a consistent manner. It keeps track of what software is installed on the computer and allows us to easily install new software, upgrade the software to newer versions, or remove software that was previously installed.

As the name suggests, package managers deal with packages: collections of files that are bundled together and can be installed and removed as a group. Often, a package is just a particular program. A software package is an archive file containing a computer program as well as necessary metadata for its deployment. The computer program can be in source code that has to be compiled and built first. Package metadata includes package description, package version, and dependencies (other packages that need to be installed beforehand).

Package managers are charged with the task of finding, installing, maintaining, or uninstalling software packages upon the user’s command. Typical functions of a package management system include:

  • Working with file archivers to extract package archives
  • Ensuring the integrity of the package by verifying their checksums and digital certificates, respectively
  • Looking up, downloading, installing, or updating existing software from a software repository or app store
  • Grouping packages by function to reduce user confusion
  • Managing dependencies to ensure a package is installed with all packages required

Package Managers differ based on the packaging system as well as the operating systems for which they are used. For example, RPM-based Linux, Yum, and DNF are package managers. For DEB-based Linux, we have apt-get, aptitude command line-based package managers. For Windows, the two most used package managers are Winget & Chocolatey. Over the next couple of weeks, I am going to do a deep dive on how to leverage these platforms along with Microsoft Intune to make applications management easier.

In this part 1 of the 4-part series, we will investigate Chocolatey and what it does. In the next installment, I will walk you through steps to get it set up in your organization using Microsoft Intune and how you can use this to manage application installment & management. In parts 3 & 4 we will look into how the same can be achieved via Winget.

Chocolatey

Chocolatey is a machine-level, command-line package manager and installer for Windows software. It uses the NuGet packaging infrastructure and Windows PowerShell to simplify the process of downloading and installing software.

Some well known features of chocolatey:

  • Deploy Anywhere: chocolatey supports all Windows versions after Windows 7. It requires PowerShell v2+ and Microsoft .NET Framework 4.x. You can deploy on-prem, to Azure, AWS, or any cloud provider you might be looking at
  • Deploy with Everything. Anything that can manage endpoints or do remote deployments can either direct Chocolatey through commands, batches, or scripts. Full configuration management solutions like Ansible, Chef, PowerShell DSC, Puppet or Salt typically have providers/modules that allow you to work within their languages to manage both Chocolatey installation/configuration and software
  • Packages are Independent and Portable. When you deploy through multiple systems or want to migrate from one to another, you can take the work you have done with Chocolatey with you. How is that for some major time-savings
  • Completely Offline and Secure. You can step up your own local repositories and start using them without the need for an internet connection
  • Create Your Own Deployment Packages and use them internally
  • Manage Dependencies With Ease. You can build specific installation paths for your applications

One of the most time-consuming tasks with Microsoft Intune is the application portion, where you package applications up to deploy. Currently, if the application is bundled as an executable (exe), the steps are as follows:

  • Grab the installation executable
  • Find the install switches – most common one is the silent switch
  • Find the install directory or registry key to tell Microsoft Intune if it installed correctly or not
  • Find the uninstall executable and any switches it has as well
  • Wrap the executable in an ‘INTUNEWIN’ format
  • Import file into Microsoft Intune
  • Configure the application with the install and uninstall switches as well as the directory it creates to Microsoft Intune knows if it installed correctly or not

With Chocolatey, the process gets reduced and we only need to do the following:

  • Find any install switches
  • Grab the installation executable
  • Find the uninstall process and switches
  • Configure the application with any install switches, or uninstall switches within the Intune blade

Stay tuned for part 2, where we install Chocolatey as a Win32 app using Microsoft Intune and install subsequent software.

Read more blogs!

How Global admin can give someone’s OneDrive access to another user?

Posted on January 4th, 2021 by admin@mismo2023

Please follow the below steps to use this feature.

  • Step-1. Login in admin center with Global Admin ID.
https://admin.microsoft.com/
  • Step-2.  Click on SharePoint
  • Step-3. Click on More features>User profiles OPEN
  • Step-4. Click on Manage User Profiles
  • Step- 5. Find User account name here,  (User1)Gopal’s one drive access has been given to another user2.
  • Step- 6. Click on Searched Profile.
  • Step- 7. Click on Manage site collection owners
  • Step- 8. Search here User2, to whom you want give access. and OK. (User1-Gopal’s One Drive access has been successfully provided to User2-Sunil Rathi)
  • Step- 9. Now we need to share the one drive link. (User1-Gopal’s One drive link will be share to User2-Sunil Rathi).

Go to Admin Center https://admin.microsoft.com/ > User>Active UsersSearch Name>Click on User Profile.

  • Step-10. Click on User1-Gopal’s OneDrive>Create link to files. (to create OneDrive shared link).
  • Step – 11.  User1-Gopal’s OneDrive link has been created. Share it with User2-Sunil Rathi, Via using this link OneDrive can be accessed by authorized User.

Tags:

Microsoft Secure Score

Posted on December 4th, 2020 by admin@mismo2023

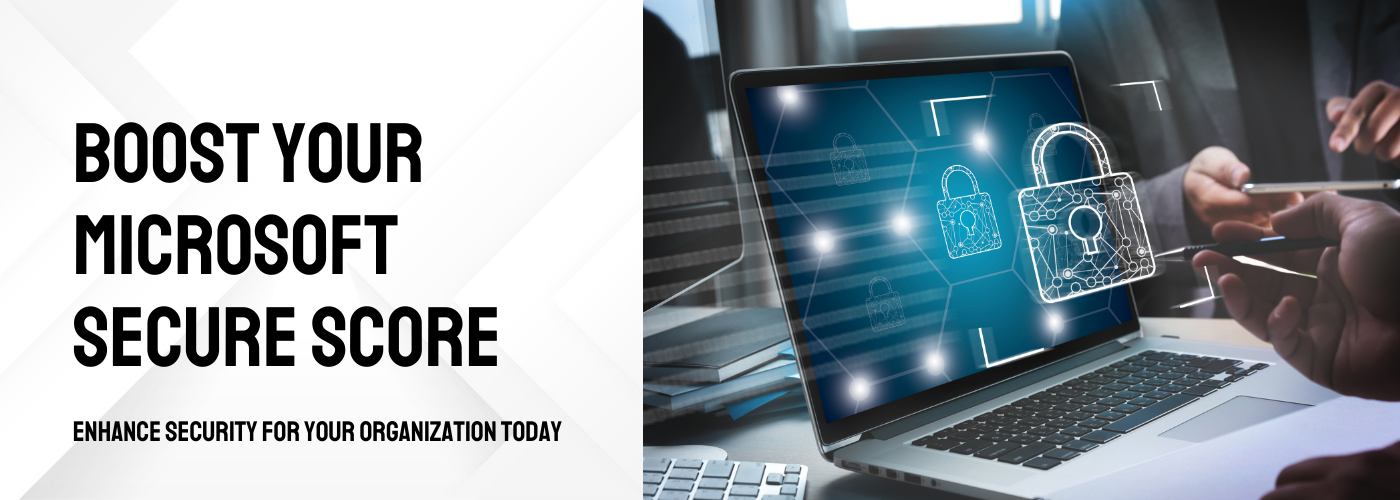
Microsoft Secure Score is a security analytics tool that provides better security configuration and security features. It applies a numerical score to custom security that outlines the action that can be taken to improve that configuration. It improves the security standards of an organization and lessens the chances of being hacked.

Why use Secure Score?

Secure score is made to help you take actions to improve your security. It gives you parameters to keep your infrastructure secure. Microsoft also offers a comparison chart to show you how your security compares to other Office 365 subscribers. Secure Score helps you understand the extent to which you have a good security configuration. It also informs you about behaviors and best practices to have inside your organization.

How does Secure Score work?

Secure Score determines what services you’re using (Exchange, OneDrive, SharePoint, etc.). It looks at your settings and activities and compares them on a baseline established by Microsoft. You’ll get a score based on how you are aligned with security best practices. It creates a full inventory of all the security configurations that reduces risk. Each control that reduces risk is calculated with points. Some controls are more effective and have more points assigned to them.

It is measured by how they are being implemented. The points provide an overall secure score. More the secure score is more is your organization protected in terms of security measures. This score below in the image represents how secure your environment is. You can measure it over time to track your progress

Office and Microsoft 365 risk assessment

Secure Score provides an overall risk assessment. It gives you links to make you aware of the risk you’re facing if you don’t follow the recommended actions.

This example shows some of the potential risks:

Account Breach – the risk indicates a tenancy breach that can be used by an attacker to interact with either resource in Office and Microsoft 365, or with on-premises infrastructure

Elevation of Privilege – an attacker has managed to compromise one or more accounts in the tenancy and is now working to increase their power

Data Exfiltration – an attacker has found a way to move data out of the tenancy

From the summary page, you can get a glimpse of how your score compares to the average score of all Microsoft customers.

Taking action

Your target score can fall into the range from Basic to Balanced, to Aggressive.

Depending on where you set your target, Secure Score would share with you a number of suggestions to help you reach your goal.

Suggestions are based on priority and the effectiveness of the action compared to the level of impact to the end-users.

Actions that are highly effective, with a low level of user impact are placed at the top, followed by actions that are less effective and more impactful to users.

You can filter these actions by category, such as User Impact, Implementation, etc. Seeing how each of these actions affects the users, allows you to balance your organization’s productivity against your security.

Some actions are not scored, which means even if the corresponding actions are implemented, the secure score won’t increase. These actions are marked as [Not Scored] in the queue. Microsoft has stated over time Microsoft Secure Score will be able to better measure these controls and adjust the score accordingly.

Score analyzer

This allows tracking and reporting of the score over time. As with the secure score summary, your score is compared daily to the average score of all Office and Microsoft 365 customers, so you can see the relative position in the security landscape to make planning and communication easier with the team and the leaders.

The graph below shows the secure score in time.

Organizations always try to ensure the highest level of security for their data and processes, in this quest Secure Score can be one easy and quick indicator, allowing for appropriate actions to be taken in order to gain umpteen level of prevention from various kinds of cyber-attacks. Optimum utilization of these features as you use the tool helps you get further peace of mind that you’re taking the right steps to protect your organization from threats.

Click here to view more such blogs by Mismo Systems!

Visio Tabs in Microsoft Teams

Posted on September 4th, 2020 by admin@mismo2023

Visio Tabs in Microsoft Teams allows team members in a dedicated space to access resources and information in a channel or chat. This helps the team to deal with resources and data directly and to have discussions about the tools and data within the structure of this forum or conversation.

Owners and members of the team can add additional tabs to a channel or chat by clicking Add a tab on top of the page (channel or chat).

You can use one click to create a tab of a Visio file in teams, as seen below. Either you can add an existing file to Teams, or you can create a new file from within Teams.

Visio Tabs in Microsoft Teams will assist you in a range of businesses-wide positions. Here are just a few cases for the business to ignite creativity –

Improving efficiency when you co-author a diagram in real-time — Multiple contributors normally generate design diagrams (for example, an architect for companies, a database architect and an architect for software are collaborating together to create an architectural model for a new module). You can ensure that coauthors can easily view the diagram and edit it as and where necessary by scanning the file by pinning the diagram in the tab. (Know more about our Workplace Managed Services)

Maintain critical procedures — companies also have systems to be successfully managed. For example, client representatives may take concrete measures to answer consumer issues in Business Process Outsourcing (BPO). If these company procedures are registered in a Visio folder, they can be applied to the workers as a team source to connect on nearly any platform at any time. Diagrams can be modified on a Visio Plan 1 or Plan 2 license in real-time as well, with updates available automatically to others.

Get up to speed quickly — A team member who did not originally draw up a diagram also needs a clearer grasp of the diagram such that an idea is communicated to other teams. An Azure consultant, for example, would compare azure with a client’s architecture. You can easily access, evaluate, apply comments to the diagram, and analyse it in detail in order to collect information, by turning the diagram into a Tab in Teams.

Simplify the discussion and revision phase — Industry experts from a wide range of industries timely think on business diagrams like Venn diagrams, pyramid diagrams, etc. Typically, these diagrams require several iterations, considering various stakeholder feedback. You can conveniently view the diagram(s) quickly and efficiently by creating a tab in an important Team Channel or conversation. by supplying all stakeholders.

All team members are supported with the inclusion of a team tab, but editing is open only to those who have a subscription to Visio Plan 1 or Plan 2. Compare plans here.